
Building a healthcare practice in today’s competitive market demands more than just medical expertise. To thrive, you must create an environment that supports your needs, enhances your staff’s performance, and makes patients feel welcome. This involves more than just choosing the right architecture and décor — it includes integrating smart technology and practical furnishings. Each of these elements directly shapes how efficiently your team operates and how smoothly your daily workflow runs. In turn, this directly influences your overall productivity and the patient experience. A comfortable, well-designed space can encourage patient trust and increase the chances they’ll return for ongoing care.
In this article, you’ll discover how intentional design can significantly improve efficiency and patient satisfaction. While some strategies are ideal for new practices or major renovations, many can still enhance your current setup without requiring full-scale construction. Even small design updates can create noticeable improvements in comfort and workflow.

Designing a Welcoming and Efficient Medical Waiting Room
Patients form their first impression of your medical practice the moment they walk into the waiting room. Modern medical design trends encourage creating an inviting space that feels more like a hotel lobby than a clinical setting. The ideal size of a waiting room depends on several factors, including the number of physicians, patient visit volume, and how efficiently your office operates. If your practice involves longer procedures that reduce patient turnover, you may need less space. In contrast, a practice with quick appointment cycles requires a larger area to accommodate more people at once. To determine the best layout, consult an architectural and design firm experienced in patient flow and medical office planning. They can offer tailored recommendations that enhance functionality and the patient experience.
Prioritizing Comfort and Practicality in Waiting Room Design
Prioritise patient comfort when designing your waiting room. Ensure ample seating without overcrowding the space. Provide practical amenities like coat hangers and storage for umbrellas and hats. If patients usually wait more than a few minutes, offer up-to-date educational or entertaining reading materials. Choose individual chairs over couches to maximize usable seating, as many patients prefer personal space. Include armless chairs for accessibility, particularly for pregnant, obese, or disabled individuals. Invest in durable, hotel-grade furniture with comfortable fabrics that match your interior theme. This thoughtful approach not only improves comfort but also boosts your office’s professional appearance.
Create a soothing ambiance through decor. Avoid chasing fast-changing design fads and opt for timeless, cheerful colors with natural tones. Warm paint or wallpaper choices help establish a welcoming feel. Select soft furnishings and materials that absorb sound, such as carpets, drapes, upholstered chairs, and acoustic ceiling tiles, to maintain a quiet and relaxing atmosphere. This attention to acoustic comfort makes the waiting experience more pleasant.
Lighting plays a key role in shaping the environment of your waiting room. Fluorescent ceiling lights offer consistent illumination, which helps maintain safety—especially for visually impaired patients. Use diffusers to prevent glare. However, many designers prefer incandescent lighting for waiting rooms because it adds warmth and hospitality. Whichever type of lighting you choose, make sure the room stays well-lit to support safety and easy reading. The right lighting enhances both the atmosphere and patient comfort.
How Much Exam Room Space Does Your Medical Practice Need?
When planning how many exam rooms your medical practice needs, focus on the types of patient visits and the frequency and variety of procedures you regularly perform. If you don’t have enough rooms, patient flow can slow down, and overall productivity may suffer. On the other hand, too many rooms can lead to unnecessary overhead costs and underutilised space.
Most family physicians work efficiently with three exam rooms and one procedure room. However, the exact number can differ in practices with multiple physicians or specialties, depending on how many procedures take place. If procedural volume is low, several physicians can comfortably share a single procedure room without disrupting workflow.
When designing each exam room, plan for slightly more space than you currently need. This allows room to accommodate future technological upgrades. Ideally, an exam room should measure 10 feet by 10 feet, though slight variations won’t hinder usability. Make sure the space comfortably fits you, a nurse or medical assistant, the patient, and at least one accompanying family member. Also, factor in wheelchair accessibility. Avoid smaller layouts like 8 feet by 8 feet, which can restrict wheelchair movement. To meet Americans with Disabilities Act (ADA) standards, design for a 60-inch turning radius for wheelchairs.
Why a Dedicated Vitals Room Can Boost Efficiency
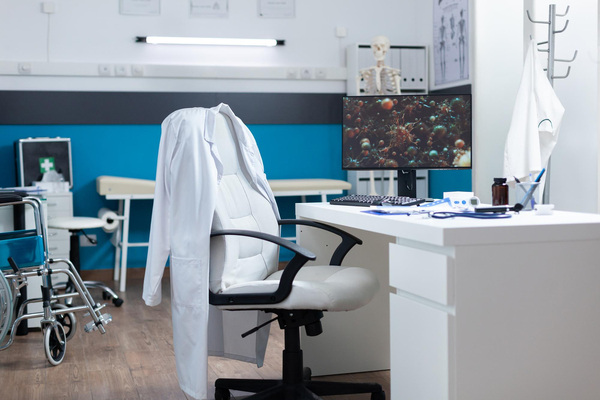
Beyond exam rooms, include a separate, smaller space where a nurse can record vital signs, height, and weight before the main exam. This helps reduce congestion during peak hours and shortens patient wait times. Ensure the space offers privacy and includes a seating or lying area for procedures like blood pressure checks or diagnostic tests using tools like an electrocardiograph, spirometer, or Holter monitor.
This dedicated space also supports the integration of PC-based diagnostic tools, which are especially beneficial if your practice uses or plans to adopt an electronic health record (EHR) system. Many modern devices now link directly to EHRs, eliminating manual data entry and reducing transcription errors. This integration streamlines workflow and enhances patient data accuracy.

What Makes an Exam Room Truly Functional and Patient-Friendly
A well-designed exam room enhances both efficiency and patient comfort, no matter how many rooms your facility has or how large they are. Prioritise patient privacy by ensuring the exam room door opens inward and swings toward the exam table. This layout helps block outside visibility and supports a more discreet environment. According to ADA guidelines, doors should be placed about 18 inches from the corner, though local regulations may differ. (Refer to the diagrams for a sample exam room floor plan.)
Design every exam room in your practice to be identical in layout and stocking. This consistency saves time and improves workflow. Flexible room layouts are valuable for adapting to different procedures. Ensure strategic placement of cabinets, sinks, desks, exam tables, lighting, chairs and waste bins to keep patient visits smooth and uninterrupted. Evaluate how the quality and location of each feature impacts both the provider’s workflow and patient experience.
Choosing the Right Exam Table for Patient Comfort and Safety
Select an exam table based on your practice’s procedures, budget and the needs of your patient base. Because patients typically spend most of their time on the exam table, comfort and accessibility are crucial. A table that lowers to 18 inches off the floor allows easier access for pregnant, post-op or mobility-limited patients, reducing strain on both patients and staff. These “barrier-free” options also help prevent back injuries during transfers and examinations.
Motorised tables add versatility, allowing you to adjust height, footrests, and back sections, with some offering Trendelenburg positioning. Additional features may include pelvic tilt, built-in pillows, removable tops and integrated power outlets. Choose tables that optimise efficiency and support a variety of diagnostic needs. (See “Exam room furniture manufacturers” and “What about used medical equipment?” for supplier details.)
To access both sides of the patient easily, place the table at an angle. This configuration boosts efficiency and deters misuse of diagnostic equipment by keeping tools out of reach when patients are left alone.
Optimising Seating for Patient Support and Provider Comfort
Choose a stool that offers spinal support and cushioning. Adjustable models with airlift functions absorb impact and improve comfort during extended use. Provide at least two side chairs for family or caregivers to accommodate different patient needs. If your EHR setup includes a drop-down desk, consider adding a third chair for convenience.
Comfortable and functional seating improves communication and enhances patient confidence. Creating a welcoming atmosphere for family members can also positively affect the overall experience.
Selecting the Best Lighting for Precise Exams
Tailor your lighting setup to match the types of procedures you perform. Lighting should deliver accurate focus, minimal shadows and adequate brightness. Choose between caster-based and wall- or ceiling-mounted units, depending on your space constraints. While halogen lights cost more and generate heat, they offer long-lasting bulbs and better energy efficiency compared to incandescent options.
Effective lighting improves diagnostic accuracy and helps maintain patient comfort. Consider light placement carefully to prevent glare or harsh shadows during exams.
Maximising Storage with Space-Saving Cabinetry
Opt for 18-inch-deep cabinets to preserve floor space without sacrificing storage. This is a more efficient alternative to the standard 24-inch kitchen cabinet. Modular cabinetry allows for custom storage solutions tailored to your practice, reducing unnecessary trips for supplies and making it easier to relocate furniture if needed.
Ensure cabinets are easy to clean, durable, and made from medical-grade materials. Steel and high-quality plastics offer better resistance to wear. Choose colour schemes that match your room’s design and maintain a clean, professional look.
Installing Accessible and Consistent Diagnostic Systems
Mount essential diagnostic tools like ophthalmoscopes, otoscopes, thermometers, and blood pressure monitors on the wall for easy access. Keeping them in the same position in each exam room standardises procedures and helps staff move efficiently between rooms.
A consistent setup across rooms not only reduces confusion but also improves care delivery by allowing clinicians to focus more on patients than locating equipment.
EHR Setup That Enhances Patient Interaction
Most practices still prefer desktop computers for EHR use, ideally located on a counter-height desk away from the sink. If you use a tablet, consider mounting it near the care area or using a rolling stand to maintain mobility and eye contact during consultations.
Proper EHR placement improves workflow while encouraging a more personal interaction with the patient. Balancing digital tools and human connection is key to a positive experience.
Providing a Private Dressing Area Within the Room
If your services require changing clothes, add a dressing area using cloth curtains, wheeled partitions, or double-door cubicles mounted to the wall. This setup protects patient modesty and avoids awkward moments if someone enters unexpectedly.
Even simple partitions significantly boost the sense of privacy and professionalism. It’s a small investment that greatly enhances patient comfort and trust.
Positioning Waste Receptacles for Clean and Efficient Disposal
Place a seamless, foot-operated waste bin under the diagnostic station. This keeps the floor clear and allows easy disposal of materials without interrupting the exam.
The bin should be easy to disinfect and large enough to handle common medical waste. Proper placement helps maintain a tidy, safe environment for both patients and staff.
Understanding Regional and Regulatory Requirements for Exam Room Dimensions
While 10 feet by 10 feet is often recommended, regional building codes and health regulations may set different standards for minimum exam room sizes. Compliance with local requirements is crucial to avoid costly modifications or fines. The Americans with Disabilities Act (ADA) mandates features like a 60-inch turning radius for wheelchairs, which significantly influences the minimum room size. Some jurisdictions may also require additional clearance for equipment or emergency access. Consulting a healthcare architect or local building authority during the planning stage helps ensure your layout meets all regulatory and accessibility criteria.
Understanding these legal standards early in your design process can prevent project delays and support smoother inspections and certifications. This step is especially important for practices planning future expansion or accreditation by medical bodies.
Balancing Room Size With Workflow and Technology Integration
The minimum size of an exam room isn’t just about measurements—it also affects how efficiently your practice operates and how well your staff can perform their duties. A room that’s too small may hinder the movement of providers, limit technology integration, or make patients feel cramped. Consider future needs such as adding an EHR station, mobile diagnostic carts, or upgraded exam tables. By planning for workflow and technology now, you can avoid disruptions and ensure your space remains functional as your practice grows.
Even modestly increasing the size from the bare minimum allows for smoother patient handoffs, better ergonomics, and more streamlined care delivery. Investing in slightly larger dimensions can pay off in long-term operational efficiency.
The Impact of Room Size on Patient Experience and Perception
The physical size of an exam room can significantly affect how patients perceive the quality of care. A cramped room may feel uncomfortable or even stressful, especially for patients with mobility aids, children, or family members accompanying them. A spacious, well-organised room promotes ease of movement, helps maintain personal boundaries, and encourages open communication between patient and provider.
In contrast, a room that feels too small may lead to rushed consultations or awkward physical arrangements, which can negatively impact patient trust and satisfaction. Designing with the patient’s emotional and physical comfort in mind reinforces your commitment to high-quality care and helps improve overall patient retention.

Why Great Design Is Essential for a Successful Healthcare Practice
If you want your healthcare practice to grow and thrive, you need to focus on improving operational efficiency and delivering exceptional patient care. One of the most effective ways to achieve this is through smart, intentional design. A well-designed practice layout reduces wasted time, improves staff workflow, and enhances the overall patient experience. By planning carefully and paying close attention to design details, you can create a space that supports both your team and your patients.
Good design isn’t just about aesthetics—it’s about functionality, accessibility, and future-proofing your practice. From the layout of consultation rooms to the placement of administrative areas, each design choice plays a crucial role in how smoothly your operations run. The strategies outlined in this article offer practical ways to enhance your environment. With the right design improvements, you can increase productivity, elevate patient satisfaction, and set a strong foundation for long-term success.
Designing for Flexibility and Long-Term Growth
Creating a healthcare environment that supports long-term growth starts with building in flexibility from the outset. A flexible design allows your practice to adapt as technologies evolve, services expand, and patient needs change. Modular furniture, movable partitions, and multi-use exam or consultation rooms can be easily reconfigured to accommodate different workflows or procedures without major renovations. This is especially important in today’s fast-paced healthcare environment, where new diagnostic tools, telehealth setups, and digital systems are becoming standard. Flexible layouts not only reduce future construction costs but also help maintain continuity of care during transitions or upgrades. Planning ahead with scalability in mind also enables your facility to grow with demand—whether that means hiring more staff, adding new specialties, or increasing patient volume. By designing with versatility, you position your healthcare practice to remain efficient, cost-effective, and competitive, no matter how the healthcare landscape shifts over time.
Conclusion
Creating a functional medical exam room starts with meeting minimum space requirements, but true success lies in thoughtful design that enhances comfort, workflow, and compliance. From ADA guidelines to patient-centred layouts, every square foot must serve a purpose. Integrating flexible furnishings, smart technology, and ergonomic planning can boost both provider performance and patient satisfaction. Remember, a cramped or poorly designed space not only limits efficiency—it impacts the quality of care and the perception of your practice. Whether you’re planning a new facility or updating an existing one, focus on building rooms that reflect professionalism, accessibility, and readiness for future growth. When your physical space supports your clinical goals, your practice is better positioned to thrive in a competitive healthcare environment and deliver care that keeps patients returning. Great design isn’t a luxury—it’s a critical foundation for long-term success.
FAQs
What is the standard size for a medical exam room?
The standard exam room size is typically 10 feet by 10 feet. This layout comfortably accommodates a provider, patient, assistant, and medical equipment. It supports smooth workflows, promotes safety, and provides enough space for family members or assistive devices without crowding the room.
What is the minimum size for ADA-compliant exam rooms?
To comply with ADA guidelines, exam rooms must allow a 60-inch turning radius for wheelchairs. This generally requires a minimum of 9 feet by 10 feet. The layout must also provide clear paths and space for patients with mobility aids to navigate safely and comfortably.
Can I use an 8×8 exam room?
An 8×8 exam room is usually too small for medical use. It restricts wheelchair access, limits staff mobility, and compromises patient comfort. Most practices avoid this size, as it often fails to meet both ADA accessibility standards and the practical needs of daily healthcare operations.
How does room size affect patient care?
Room size directly impacts patient comfort, safety, and communication. A spacious exam room reduces anxiety, allows providers to move freely, and improves interaction. Sufficient space supports better workflow and ensures patients using wheelchairs or mobility aids receive care in a respectful, comfortable environment.
Do exam room size rules vary by location?
Yes, exam room size requirements vary by region. While ADA standards apply nationally in the U.S., local building codes and healthcare regulations may impose stricter guidelines. Always consult a licensed healthcare architect or local authority to ensure your design complies with all relevant codes.